|
|
How To Mind Map
If you want to know how to mind map, you've come to the right place. All the step by step instructions are here.
If you don't already know about mind maps and how they benefit you, I strongly recommend reading the
mind map overview
page, and the examples of mind maps page. Once you've read that continue on from here...
You Will Need

- A plain A4 piece of paper (with no lines, they stop the natural flow of ideas).
- A selection of felt tip pens (textas), your favourite colours of course.
- A black or blue (preferably black) pen or fineliner.
- Your wonderful brain!
So get your favourite drink, get comfy at your desk and get ready to learn how to mind map!
Instuctions
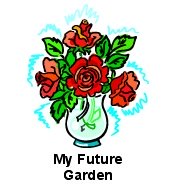
- Start with your central idea. If I was doing a mind map on planning for my future garden, my central image could be roses.
Now that you know your central idea, you are going to do a quick sketch of it on a spare piece of paper or on the back of your mind map sheet lightly.
Once you are happy with your central image draw it using lots of colours onto your sheet, in the centre.
Here is an example of what my page would be like, at this stage.
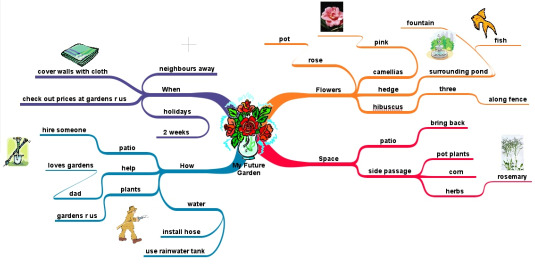
- Now that I have my central idea, I am going to start building my main ideas. For my future garden one of my main points would be flowers. This is equal to a heading in linear notes. Your main ideas all branch out from the central idea, so that you can grow and grow and grow, and the ideas just flow and flow and flow! Your main branches are like the roots of your mind map therefore these lines are wide, and with the more specific information the lines get thinner. So start by drawing your main branch with your favourite colour and write the heading on it with your black or blue fine-liner pen the heading.
This is what my mind map would look like now...

- Now that you have built your first branch, build on that topic. These branches leading off from the main brainches would be equal to the words or bullet points in linear notes. In my case: what flowers do I want?
I want camellias, maybe some hibiscus, oh and I want the pink camellia kind, and I definitely want a hedge of some sort.
You should start to grow on these ideas, and keep them flowing. Keep in mind that using mind maps for planning something is not the only use of mind maps, look at the examples of mind maps
page.
Keep growing on your thoughts and continue to build up the map, you should start to see your thoughts are flowing freely. By the end, your mind map should look something like this...
GREAT, you have built your very first mind map! Well done, you have completely covered the how to mind map page. You are well on your way to a bright mind mapping future! But before you race ahead, make sure to read the mind mapping tips below.
Mind Mapping Tips
- Generally, the branches get thinner as you progress from your sub - categories to your sub - sub categories and so on.
- Try to add lots of pictures, remember a picture is worth a thousand words! Your brain likes to remember using both sides of your brain, so use words and pictures. For more on this visit the left and right brain page. This will show you exactly how this page on how to mind map, works just perfectly with your brain. Pictures can be added on their own branch, or at the end of a branch.
- If you are using your mind maps for note taking, revision or studying for tests or exams, you may want to look at the revision notes page.
- All of your branches should be curved as it reflects on your internal brain structure. Curved lines excite your brain, straight lines are boring.
Well, it has been a pleasure teaching you how to mind map, I hope you have found it helpful. Feel free to browse the left hand navigation to take a look at some other articles that may interest you. For those of you that are interested in the various mind mapping software available visit the mind mapping software page.
Return from how to mind map to home
|
|


